RENAULT 4CV WINDSCREEN AND REAR SCREEN INSTALLATION
Overview :
Both, the windscreen and rear screen are set inside the car, and the string used to position the outside seal lip is pulled around outside the vehicle. When installed, with respect to the front of the car, the windscreen is behind the iron frame which holds the rubber seal. Note that the original Renault repair manual included an error and a correction was not published before 1957!
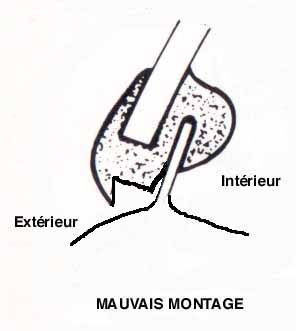
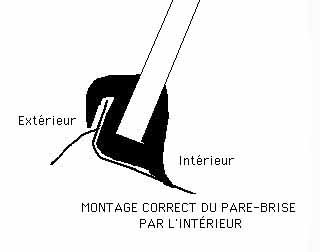
Wrong position of the wind screen !
Observation of the rubber gasket section
before installation and inside lip returning
Sequence of actions :
Both windscreen and rear screen are normally installed after the paint job and prior to the roof cloth and dash board installation (to avoid scratch them). For the windscreen, the steering wheel must be removed as well as the sun visors and the rear view mirror.
In the sequel, only the windscreen is referred to but the same procedure is fully applicable to the rear screen. Two persons ( 4 hands or more...) are highly suggested to fit the screen.
Required equipment :
- Two suction cup holders are required to position the windscreen behind the frame. A hoist attached to the holders fitted outside the screen may help to position the screen, specially if no assistant is available. Use a small traction. An alternate and recommended solution includes an assistant pushing the cup holders from inside the car.
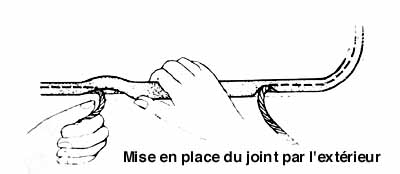
- A two mm diameter nylon rope will be used to lift the small seal lip above the frame.
- Windscreen sealer, e.g. 3M reference 08509 (black) and the matching gun are needed. This type of sealer remains reasonably soft for a long time. Silicone sealer type is to be avoided since it will be hard before the screen is correctly in!
- Rubber lubricant: e.g. Yellow 77 from Ideal industries Inc. (water based) used to pull electrical wire in conduits will be very instrumental to ease up the gasket outside lip transfer over the screen frame.
- Solvent and a lot of cloth will be required to wipe off any extra sealer. Avoid putting sealer on the paint since the solvent may tarnish it.
- A rubber hammer is a must.
- Some kind of L shape tool (e.g. 3 mm hex wrench) to lift the seal lip may help, should the string fail to do the job at some places.
- Masking tape may be used to protect the body paint outside and around the screen.
- As mentioned previously, help from an assistant if highly recommended.
Getting ready :
Without using any sealer, position the gasket over the screen to check that it fits normally. If the seal is not closed, it should be cut as straight as possible to the correct length without too much traction. Note that the windshield bottom section is concave and will yield some further traction after installation. Both ends of the seal are glued with a permanent strong cyanocrylate glue.Take care about the windscreen orientation ! The circular glass treatment visible with an horizontal light should be in frond of the driver. Left on a left drive car and right on a rigth hand car.
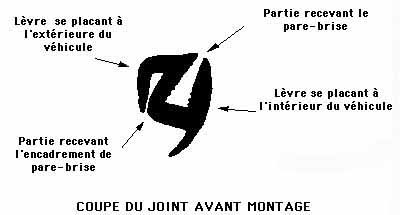
Attach suction cup handles inside the screen and lay it on a working bench, handles on the bench. Using the gun, deposit sealer all around and inside the sealer large groove. Position the rubber seal over the screen so that the gasket joint (if any) is about in the middle of the screen lower horizontal section and the small groove is on top (opposite to the handles). The drawing below depicts the correct position of the screen frame, rubber gasket and screen.
Correct position of the rubber gasket on the screen farme.
(note the inside rubber lip returning)
Pinch the seal all around to push excess sealing material outside the gasket groove and remove with a spatula and solvent. Remove as much as possible excess sealer at this stage. Do not place any sealer in the gasket outside groove destined to fit over the frame.
The rope shoud be outside the car.
Installation :
Pick up the screen using the suction cup holders and place it inside the car, horizontally centered. Approach the bottom part first so as to go beyond the windshield ventilation holes in the lower corners. At this point, it seems that the windshield top part will never fit inside the frame!Keep faith, it will! Start with the bottom, constantly pushing from inside so that the gasket outside lip passes over the frame. Roll the rope around a screwdriver handle if required to have a better traction. When the bottom part is in, the windshield will move forward and down. Stop pulling when the gasket lip is “late” with respect to the string and use the hex wrench to pull over the outside lip section which is “behind”.
Without any fear, use the rubber hammer on the vertical sections and top part to press the shield/gasket in the frame and keep going with one side of the rope. Don't worry about the gasket position inside, specially in the corners, this will be later corrected using the hex. wrench.
When the gasket is correctly positioned all around, press firmly inside and outside on the gasket lips to push excess sealer on the glass. Specially check the corners. Remove excess sealer and clean the glass.
Water tightness :
Using a water hose, ask your assistant to spray water outside the screen and check for the absence of leaks inside.
Jean-Pierre DELAUNOY
Translation and adaptation by Jean-Pierre COMBOT
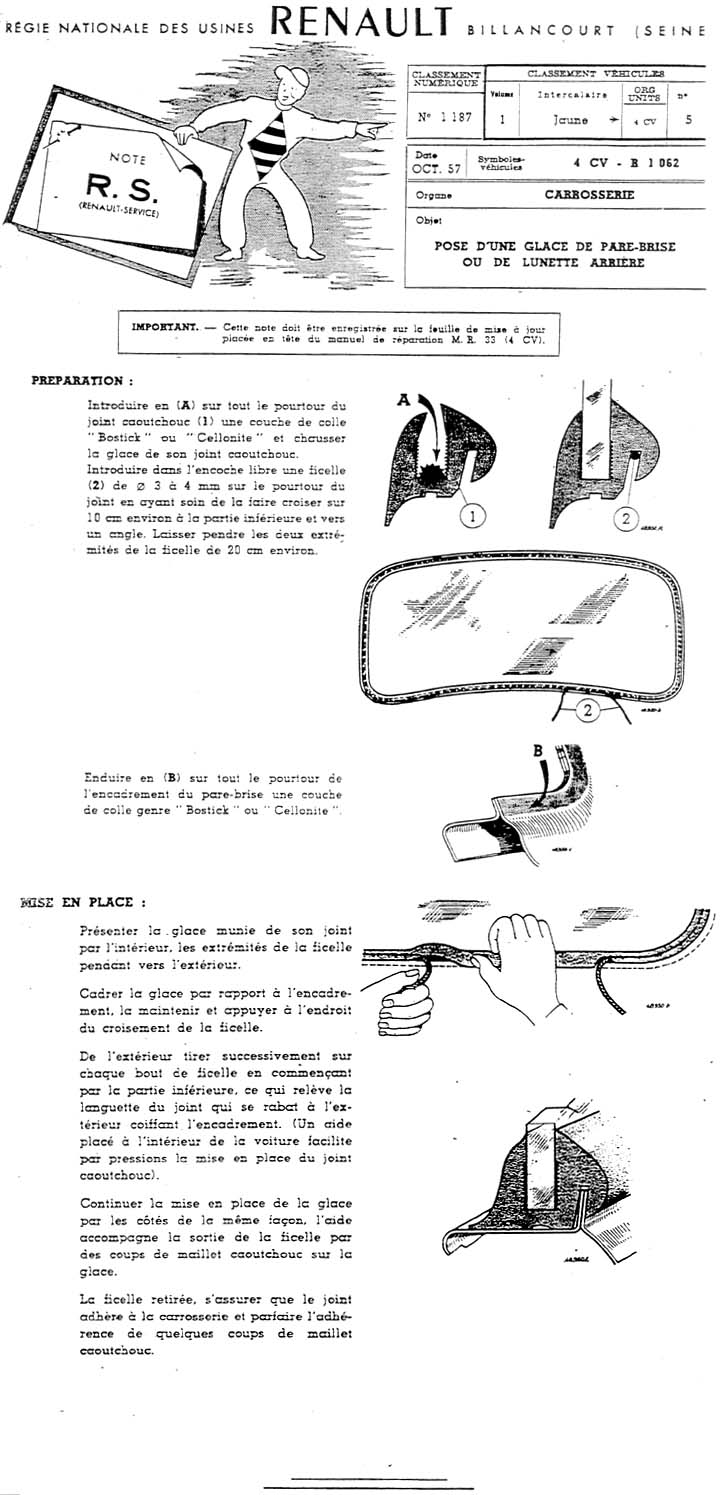
Here-under, the Renault corrective note concerning 4CV windscreen installation !
Jean-Pierre DELAUNOY Septembre 2002